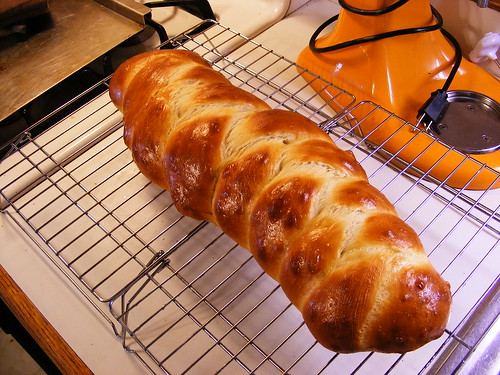
Challah v2.0

BTW, I need to get something out of my system...
I LOVE BREAD PUDDING!!
And just an FYI, the Limoncello bread pudding at Carrabba's is freakin' awesome! If you know any other bread pudding I should try, please let me know. :D Until then, enjoy these photos and bookmark the recipe (or buy the book, it's amazing)!


 Challah (from “The Art and Soul of Baking” by Cindy Mushet)
Makes 1 loaf
3/4 cup (6 ounces) warm water (110° to 115°F)
2 tablespoons (1 1/2 ounces) honey
1 1/2 teaspoons active dry yeast, or 1 1/8 teaspoons instant yeast
2 large eggs, at room temperature
3 tablespoons (1 1/2 ounces) neutral oil, such as canola or safflower
2 1/2 cups (12 1/2 ounces) bread flour or unbleached all-purpose flour, plus more if needed
3/4 teaspoon salt
1 large egg, lightly beaten
2 teaspoons poppy seeds (optional)
Combine the warm water and honey in the bowl of the stand mixer and sprinkle the yeast over the top. Whisk by hand to blend well. Let the mixture sit for 5 to 10 minutes, until the yeast is activated and foamy or bubbling. Add the eggs and oil and whisk by hand until well blended. Stir in the flour and salt. Attach the dough hook and knead on low speed for 2 minutes, scraping down the bowl as necessary, until the dough begins to come together. Turn the speed to medium and knead for 6 to 8 minutes, until the dough is smooth, silky, and elastic. You may need to add a little extra flour, a tablespoon at a time, toward the end. The dough should begin to pull away from the sides of the bowl but still be slightly tacky.
Lightly oil the tub or bowl, scrape the dough into the tub, and brush the surface of the dough with a little oil. Cover with plastic wrap or a damp lint-free cotton towel and let the dough rise until doubled in size, 45 to 60 minutes. If you are using a tub, be sure to mark the starting level of the dough with a pencil or piece of tape so it's easy to tell when the dough has doubled.
Turn the dough out onto a lightly floured work surface. Press down on the dough firmly to expel some of the air bubbles, but don't knead the dough again or it will be too springy and difficult to shape (if this happens, simply cover the dough with plastic wrap or a lint-free cotton towel and let it rest for 10 to 15 minutes to give the gluten some time to relax). Divide the dough into 3 equal pieces (about 8 1/2 ounces each). Work with one piece at a time and keep the others covered to prevent a skin from forming. Using flattened hands, roll each piece back and forth, forming a rope about 15 inches long with tapered ends. You may not be able to stretch each piece to the full length the first time; if that's the case, cover it and continue with another piece. Return to the first piece when you've finished the others and try stretching it a little more.
Line a large baking sheet with parchment paper or a silicone mat and lay the 3 ropes on the sheet with the ends facing you. Pinch together the three ends furthest you. Braid the dough, pinching the loose ends together at the bottom. Gently stretch ends outward so the center is plump while the ends are tapered. Tuck the ends under slightly.
Cover the braid loosely with plastic wrap or a damp lint-free cotton towel. Allow the braid to rise until it is almost double in size and looks like it has taken a deep breath, 40 to 50 minutes.
Preheat the oven to 375°F and position an oven rack in the center. Gently brush the entire surface of the braid with a light wash of beaten egg. (You will not use all the egg.) Take care that there are no pools or drips of glaze. Sprinkle with the poppy seeds, if you like. Bake for 20 to 25 minutes, until the top and bottom are golden brown and the internal temperature registers 190°F on an instant-read thermometer. Transfer to a rack to cool completely. To serve, slice with a serrated knife.
Challah is at its best the same day it is baked. But, you can store the bread, wrapped in plastic, at room temperature for 2 days. For longer storage, double-wrap in plastic and freeze in a resealable plastic freezer bag for up to 1 month. Thaw on the counter for 1 1/2 to 2 hours, until it reaches room temperature. Reheat in a 375°F oven for 10 to 15 minutes, until the bread is warmed through.
DAIRY CHALLAH: (This is the recipe I used!) This version of challah is more tender than the pareve challah above, because it contains milk and butter. Replace the water with the same amount of milk and the oil with the same amount of very soft butter.

Baca Juga


Post a Comment
Post a Comment